Making my first sourdough bread


So, I have always been interested in trying to bake bread,
but I have never had much luck with commercial yeast and getting my dough to
rise. Not sure if I would use water that
was too hot or what, just never had much luck and it discouraged me from continuing
on. Then when surfing
homesteading sites/blogs I kept on running into blogs about making a sourdough
starter, it piqued my curiosity, so I started reading more on it. Turns out there was a way to make bread without
a commercial yeast! As I am very much
about self sufficiency and eventually want to culture my own yogurt and
cottage cheese, this looked like an ideal place to start, learning to
bake bread and gain some experience with cultured foods. Making a sourdough starter is surprisingly easy
but time consuming in that it takes about a week from start to finish. While that sounds intimidating, the truth is
it only takes a couple minutes a day. A
sour dough starter is basically made by harvesting the local heathy bacteria and yeast in
our environment and growing it to the point that we can use it to replace commercial
yeast. That means everyone’s starter
will be unique, depending on where they live and the amount of
time you spend in different stages of making the final bread, you can adjust
the “sourness” of your bread by "proofing" it longer.
This portion will be a very quick tutorial on how I made my
starter, if you want more on the science as well as details on how it should look
at different stages here is a link to one of the websites I used to base my
recipie off of https://blog.kingarthurflour.com/2012/04/05/creating-your-own-sourdough-starter-the-path-to-great-bread/
One last disclaimer, please realize my heritage is Cajun, as
whole we do not do well with exact measurements, it is more the art then the
science to us so I stick to measuring by the cup rather then a scale as many bakers do now. We (Cajuns) also like to take our time cooking to let the tastes fully develop. The recipe I adapted allows that to happen. I wanted to experience the journey so to speak so I chose a recipe that allowed me to do that and learn in the process.
As a last note, please forgive the shadows on the pictures!
As a last note, please forgive the shadows on the pictures!
Sourdough starter:
Ingredients: ¾ cup Flour (all purpose or bread) times 9 mixings
½ cup water (non-chlorinated works best) times 9 mixings
½ cup water (non-chlorinated works best) times 9 mixings
Day one:
Mix ¾ cup flour with ½ cup water in a 2 quart container (I use a silicone spatula for stirring)
and stir until all the flour is mixed in and you can not see any “dry spots”. Cover with a breathable cover such as a dry dish
towel and let set at room temperature (at least 70 degrees) for 24 hours.
Days 2-3, repeat the above, just add to the previous day’s mixture
Days 4-5 by now your starter should be showing bubbling on
the surface each day, so you know it is working, that is what it should be
doing! On day 4-5 the volume of your
starter is much more then you need so you will need to reduce it by half each
day before adding that day’s flour and water.
Day 6-7 at this point your culture should be growing to the
point that it will eat through the ¾ cup flour, much quicker and you will
double the “feedings” to every 12 hours. Continue to half your starter before
feeding. At the
end of day 7 your culture should be starting to bubble as soon as you finish stirring
your ingredients into it. One way to
test your starter is to drop some of it into a glass of water, if it floats it
is ready!
Maintaining your starter-
At this point you can either keep your starter out by feeding it daily
or you can put it in the fridge (sealed container to retain moisture) and only
feed it once a week and take it out a couple days prior to your using it to
bake, feeding it a couple hours after you take it out of the fridge and repeating your daily feedings.
 |
| The starter ready to go! |
So…. Now on to making sourdough bread.
Here is what I used:
For the leaven:
¼ cup active sourdough starter
1/2 cup all-purpose flour or bread flour
1/3 cup water
For the dough:
1 tablespoon salt
2 1/2 cups) water
5 cups all-purpose flour or bread flour
I tablesoon olive oil
I tablesoon olive oil
Equipment
Small mixing bowl
Large mixing bowl
Plastic wrap or other covering for the bowls
Spatula
Pastry scraper
Bread proofing baskets, colanders, or mixing bowls
Dutch ovens or large heavy-bottomed pots with
lids
Lame, sharp knife, or serrated knife
Make the leaven (best done the night before bakeing) Mix the ingrediates for the leaven, it should make a fairly thick batter, Cover and let it set at room temp (about 70-75) for about 12 hours. At this point it should have relaxed some and been a little bubbly. If you want to check if it is ready, spoon just a bit in a cup of water, if it floats you are ready!
 |
Leaven before it sets over night

Leaven the next morning, see how it expanded and smoothed out some
|
Mix the leaven and water: Combine
the leaven and 2 cups of water (setting the rest aside for now) for the dough in a large mixing bowl. Stir
with a spatula or use your hands to break up and dissolve the leaven into the
water. It does not have to be completely dissolved, then add the flour: Stir
the flour into the water and leaven with a spatula until you see no more
visible dry flour and you've formed a very shaggy dough.

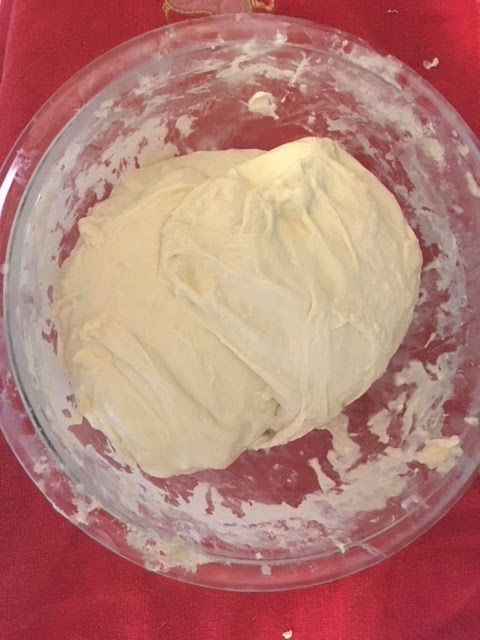
Before Resting
|
Rest the dough for up to 4 hours
(but at least 1 hour), this will depend on how much of a rush you are in, for this
first attempt I did 3 hours. This step is called the autolyze stage, the flour is adsorbing the water and the enzymes are starting to break down the starches
and proteins, so do not rush if you do not have to! Cover
the bowl and let the dough rest
 |
| After Resting, notice how it is expanded and settled |
At the end of your autolze stage, mix in the salt/oil/water solution. Work the liquid and salt into the dough by pinching and squeezing the dough. The dough will feel quite wet and loose at this point. For this I just used my hands, the dough will not stick to your hands much due to the water.
 |
| After adding the salt and water |
Rather then kneeding the dough, we
will fold it. We will fold 6 times
letting it rest 30 minutes between each fold. To
fold the dough, grab the dough at one side, lift it up, and fold it over on top
of itself. Fold the dough four times, giving the bowl a quarter turn in between
folds. Let the dough rest 30 minutes, then repeat. The dough will start out pretty
rough looking and very loose, but will
gradually smooth out and become tighter as you continue folding. For me, by the
time we got to the last fold, I had to hold the dough with one hand while I
stretched it with the other!
 |
| After the second fold, still pretty loose |
 |
| After the third folf |
 |
| After the 4th fold |
Let the dough rise undisturbed 60 minutes Once
you've finished the folds, let the dough rise undisturbed for 60 minutes, until
it looks slightly puffed. This dough won't double in size the way regular,
non-sourdough breads will; it should just look larger than it did when you
started.
 |
| As you can see it did rise but not as much as with yeast |
Divide the dough: Sprinkle
some flour over your counter and turn the dough out on to the counter. Work gently to
avoid deflating the dough. Use a pastry scraper to divide the dough in half. (I
did not have the scraper so I just used a sharp knife).
Shape the dough into loose rounds: Sprinkle
a little flour over each piece of dough. This isn't the final shaping, just a
preliminary shaping to prep the dough for further shaping. You are gently shaping the dough in order to
make it round with a little dome on top, ideally you will be able to use the friction
of your counter top to tighten the top
of your dough a little. At this time you
will rest the dough for another ½ hour.
Because this is a high hydration dough, it will probably flatten our a
little bit so do not get discouraged if it does that!


Prepare 2
bread proofing baskets, colanders, or mixing bowls: Line
2 bread proofing baskets, colanders, or mixing bowls with clean dishtowels.
Dust them heavily with flour, rubbing the flour into the cloth on the bottom
and up the sides with your fingers. Use more flour than you think you'll need —
it should form a thin layer over the surface of the towel. (ok this is the step
I made my mistakes on, 1st I did not flour the towels enough and my
dough stuck it and I used bowls that were to big and it did not hold my dough
to shape in step 13. If you do not have
proofing baskets use a medium size mixing bowl rather then a large!)
Shape the
loaves: Dust the top of one of the balls of dough with flour. Flip
it over with a pastry scraper so that the floured side is against the board and
the un-floured, sticky surface is up. Shape the loaf much like you folded the
dough earlier: Grab the lip of the dough at the bottom, pull it gently up, then
fold it over onto the center of the dough, gradually work your way all the way
around the dough, some people only fold it 4 times, I did eight to make it a
little smoother. Once you have made it all the way around, use
your thumb to grab the bottom lip again and gently roll the dough over so that
the part you folded in now on bottom. If it's not quite a round or the top doesn't
seem taut to you, cup your palms around the dough (furthest away from you) and gently
pull towards you just slightly, then rotate it a ¼ turn and repeat until you
are happy with the tightness of the top. Repeat with the second ball of dough.
Transfer to
the proofing baskets: Dust the tops and sides of the
shaped loaves generously with flour. Place them into the proofing baskets
upside down, so the seams from shaping are on top.


Let the dough
rise (3 to 4 hours, or overnight in the fridge): Cover
the baskets loosely with a cloth, or as I did, just wrap the excess from your
bowl over the top. Alternatively, place
the covered basket in the refrigerator and let them rise slowly overnight, 12
to 15 hours. If rising overnight, bake the loaves straight from the fridge; no
need to warm before baking. (I tried both methods, the one that was in the fridge
probably tasted just a touch sourer)

Transfer the
loaves to the Dutch ovens: Carefully remove one
of the Dutch ovens from the oven and remove the lid. Tip the loaf into the pot
so the seam-side is down. (this is where I had my issue with my dough sticking
to the towel! Do not be stingy with the flour! If that does happen pull the towel
away and gently as you can and just try to pinch the dough shut where it tore,
will not affect the taste just the appearence)
Score the top
of the loaf: Use a sharp knife, or serrated knife to quickly
score the surface of the loaves. You can be a little original this will shape
where the bread expands, some use this step to make their “signature” loaves,
kind of their trademark!.
Bake the
loaves for 20 minutes: Cover the pots and place them in
the oven to bake for 20 minutes.
Reduce the
oven temperature to 450°F and bake another 10 minutes. Don’t
look, you will let the steam escape, just reduce the oven temperature
After 30 minutes of baking, remove
the lids from the pots to release any remaining steam. At this point, the loaves
should have "sprung" up, have a dry surface, and be just beginning to
show golden color. Place the pots back in the oven, uncovered.
Bake another
15 to 25 minutes. Continue baking until the crust
is deeply browned; aim for just short of burnt. It might feel a bit unnatural
to bake loaves this fully, but this is where a lot of the flavor and texture of
the crust comes in. (another bit of warning, if you pull them out when it is “golden
brown”, prepare of an uncooked middle!)
 |
| Finished Product! |
Cool the
loaves completely: When done, lift the loaves out
of the pots using a spatula. Transfer them to cooling racks to cool completely.
Wait until they have cooled to room temperature before slicing.
 |
| Looks Yummy! |
This recipe produced a very nice “artisan” loaf on my first go! Not being a original connoisseur of sour
dough, I was pretty surprised with the size of the holes inside the bread! I did make a couple little mistakes but over
all I was very happy with the results!
Considering I really jumped into the deep end for my first attempt (you
can find simpler recipes out there). I
was very happy with my results! If you
are looking for more of a sandwich type bread with smaller holes you will need
to try a reduced hydration bread dough, maybe cut the water down to about 1 ½ or
1 ¾ cups of water and adjust from there!
This is cooking, feel free to experiment!
Comments
Post a Comment